Beginner's Introduction to Using GarageBand for Remote Collaboration
Author: David R. Miller
[email protected]
Date: March 10, 2021
Disclaimer: The opinions expressed in this article are those of the author and are not necessarily those of Ottawa Jazz Happenings or of JazzWorks Canada.
Introduction
In these pandemic days, all musicians are looking for ways to remain connected to their musical compadres. One way to do it is by collaborating asynchronously – i.e. not in real time. This means that each participant records his or her part (track) separately and someone assembles and mixes the tracks to create the final piece.
If you have a desktop iMac or a MacBook computer, you have at your disposal an excellent piece of software for making music. GarageBand is part of a suite of software that Apple gives you for free. It is the little brother to Logic Pro, Apple's pro-level digital workstation software.
GarageBand is designed to be easy to use – and it is, but it also has amazing depth that you will need a long time to explore thoroughly. Lots of information is available online, much of it in the form of YouTube videos. Patrick's GarageBand Guide is worthy of mention.
Scenario
We'll start with a simple scenario. Let’s say one of your buddies has recorded some music and sends you an mp3 file, suggesting that you could lay down a complementary track. We’ll assume that you own an iMac or MacBook. (I’m not going to cover iOS versions of GarageBand here.) We’ll also assume that you are a relative beginner to GarageBand.
We'll start with a simple scenario. Let’s say one of your buddies has recorded some music and sends you an mp3 file, suggesting that you could lay down a complementary track. We’ll assume that you own an iMac or MacBook. (I’m not going to cover iOS versions of GarageBand here.) We’ll also assume that you are a relative beginner to GarageBand.
Instrument to Computer Connection
The first thing to figure out is how to get the sound of your instrument into the computer.
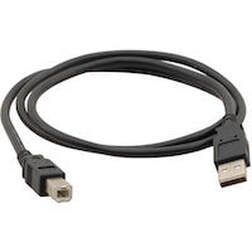
If you're a keyboard player, you have it easier, but you have to check whether your keyboard outputs MIDI through its USB port. Most modern digital pianos do, so try this approach first. Then all you need is a USB-AB cord (Image 1). You may well have one of these lying around, because they're used to connect printers and other peripherals.
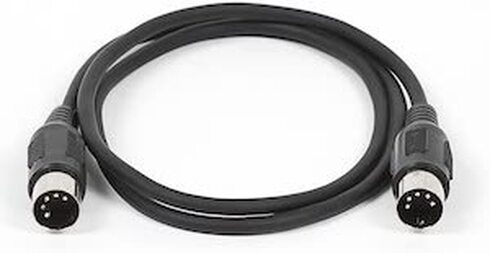
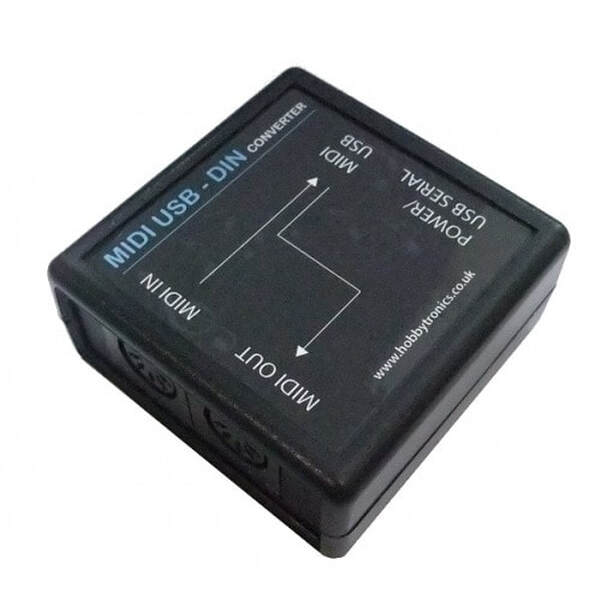
If you have an older keyboard that does not output MIDI via USB, or doesn't have a USB port at all, it undoubtedly outputs MIDI through a MIDI port (look for "MIDI out" at the back). In this case, you'll need a MIDI cord (Image 2), as well as a MIDI to USB converter box (Image 3). You connect your keyboard or converter to the computer by plugging the USB cord into one of the computer's free USB ports.
Now you're ready to record a MIDI keyboard track using sounds built into GarageBand. The great thing is that you will have the luxury of manually editing or rerecording parts of your performance after the fact, if you want.
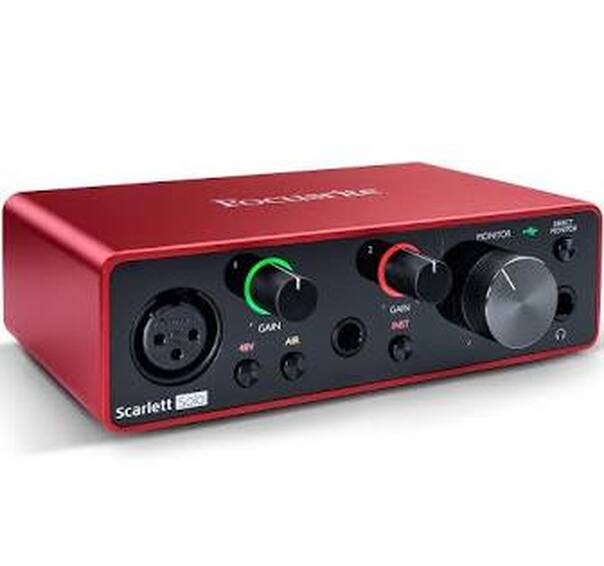
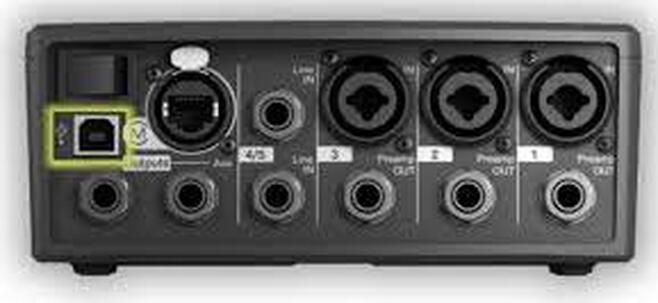
If you're a wind or string player or a singer, recording yourself is a little more complicated. You will need a decent microphone. If you have a USB mic, you will plug it directly into one of the computer's USB ports. If you have a non-USB mic, you will need an analog to USB converter. You can use a stand-alone device known as an audio interface (Image 4) or route your mic through a mixer that has a USB output (Image 5). And, if you're using a guitar amp, check whether it has USB output, in which case you won't need a mic at all.
If you're a wind or string player or a singer, recording yourself is a little more complicated. You will need a decent microphone. If you have a USB mic, you will plug it directly into one of the computer's USB ports. If you have a non-USB mic, you will need an analog to USB converter. You can use a stand-alone device known as an audio interface (Image 4) or route your mic through a mixer that has a USB output (Image 5). And, if you're using a guitar amp, check whether it has USB output, in which case you won't need a mic at all.
Setting Up GarageBand
OK, now that your instrument is turned on and ready to go, it’s time to fire up the computer and open GarageBand. Create a new empty project. You will be asked to select the type of the first track. If you're using a MIDI keyboard, pick “Software Instrument”, otherwise pick “Audio”. Your project will open with the one track you specified.
Now let's make sure your input is working. If you're using a MIDI keyboard, an electric piano sound has already been loaded as the default. Turn the volume on your keyboard completely off and the volume on your computer up. Tickle the ivories. The track volume meter should flash green and yellow (Image 6) and you should be able to hear sound from the computer. Similarly, if you're using an audio source, sing or play your instrument and you should see green lights flash on the track and the sound should come out of your computer.
Feedback
Now's the time to have a discussion about feedback. When you use a microphone to record, you are prone to feedback because the sound coming out of the computer is picked up by your mic, and around the sound goes in a feedback loop. There are two ways to avoid this.
First, you can turn off track monitoring in GarageBand. There's an checkbox option to do this when you create the track, but you can easily toggle it on and off in the track header (orange button in Image 7). Turning monitoring off means that the track will be recorded, but the sound will not be added to the output from the computer, so no possibility of feedback.
The second and better way to eliminate feedback is to use headphones. Just plug them into your computer's headphone jack. The noise-cancelling type works the best, but any headphones of decent quality will do. In this case, you want track monitoring enabled so you can hear what you're singing or playing in the headphones. There won't be feedback because the sound only goes to the headphones.
Whether or not you are using a microphone, headphones are the preferred option because of their improved sound quality. (The sound produced by computers is generally not the best.) In my experience, wired headphones are better than wireless (bluetooth) because there is a slight delay over bluetooth that is extremely annoying.
Whether or not you are using a microphone, headphones are the preferred option because of their improved sound quality. (The sound produced by computers is generally not the best.) In my experience, wired headphones are better than wireless (bluetooth) because there is a slight delay over bluetooth that is extremely annoying.
Recording
If you're brand new to GarageBand, this is your chance to fool around with it a bit. Try these steps:
If you're brand new to GarageBand, this is your chance to fool around with it a bit. Try these steps:
- Make sure the metronome (Image 8) is off (grey)
- Hit Return to make sure the scrub bar (vertical bar) is at the beginning.
- Hit R to start recording.
- Play, sing or say something!
- Hit the space bar to stop recording.
- Hit Return to go back to the beginning.
- Hit the space bar to play.
- OMG that's awful! So hit Cmd-Z to undo, which in this case means delete what you just recorded.
- Rinse and repeat. When you've got something you like, hit Cmd-S to save the results to a file.
If you're a keyboard player, you can change your sound to another type of keyboard or in fact to any of GarageBand's sampled instruments. With the track selected by clicking on the track header, simply navigate through the Library of sounds to find what you want. (If the library isn't visible, hit "Y"). GarageBand has a really nice Steinway Grand, for example.
There's much, much more to GarageBand than this, but I will leave it to you to watch some tutorials and get up to speed.
There's much, much more to GarageBand than this, but I will leave it to you to watch some tutorials and get up to speed.
Importing
You remember we hypothesized that a friend has sent you an mp3 file and suggested that you record something complementary. Here's how this works.
First, make sure you’re at the beginning of the piece by hitting Return. Then, keeping GarageBand open, switch to the Finder and locate your friend's mp3. Click and drag the file into the GarageBand window under any existing tracks. Before letting go of the mouse button, drag the new track you're importing as far as possible to the left – i.e. the beginning of the piece. This is important because it will ensure that your recording will be exactly the same length.
If all goes well, GarageBand will create a new audio track with your friend's playing or singing. You now can create your own track if necessary (Track > New Track) and record while listening to the track you imported. Remember to save (Cmd-S) whenever you've got something down you don't want to lose. Your other handy shortcut is Cmd-Z to undo, which will undo everything step by step since GarageBand was opened. Its counterpart – Redo – is Cmd-Shift-Z. Many other functions are available.
One easy but important thing you can do is adjust the relative volumes of the tracks by adjusting the volume sliders in the track headers (Image 6). Note that this affects the volume of the entire track – not just where you are in it. (It is possible to adjust the volume of a track in specific places using what GarageBand calls automation, but that's a more advanced topic.)
Exporting
Okay, let's assume that you've recorded something that works beautifully with your friend's playing and that you have balanced the track volumes. Now you want to send it back to him or her. There are two ways to do this.
First, you can create a mix of the two of you (or more) playing together. Make sure that you’ve saved your file. Then select Share > Export. In the resulting dialog, select MP3 24-bit as your output format and edit the file name as you want (or use the time-stamped file name that GarageBand proposes). Navigate to an appropriate directory and let GarageBand save the file.
The second option, if your friend is also using GarageBand or something similar (like Audacity), is to send only the track(s) that you have created and let him or her mix everything together. In this case, mute any of the tracks (like the one you originally imported) that you did not record. You do this by clicking the mute icon in the track header (leftmost button in Image 6). Play the piece and make sure that you hear only what you want to export. Then complete the steps in the preceding paragraph. You should probably include an indication in the filename of what the file includes. And remember when you come back to the piece that you have muted one or more of the tracks.
Exchanging Files
How do you get the file to your friend? You can email it, of course, but since audio files can be quite big, it's better to use a cloud file-sharing service. There are many that give you a certain amount of storage for free: DropBox, Google Drive, Box, OneDrive, and iCloud, to name a few. Upload your masterpiece to your file-sharing service and send a link to the file to your friend, who can import it into his or her program. Syncing the two tracks is sometimes tricky but, if you dragged the file you originally imported all the way to the left as I recommended, your track should be exactly the same length.
I hope this brief article will set you on the path to successful long-distance musical collaboration using GarageBand. There’s a lot more to talk about, but we will have to save that for a possible future article. Let me know if there’s a GarageBand topic of interest to you.
David R. Miller
[email protected]

